
Have you ever felt like you’re stuck with the same old licks when it comes to improvising? Or that you’re trying to create a solo from a strict set of scales. The truth is many players share this frustration and it all goes back to the practice room.
You see when it comes to tackling jazz improvisation, most players approach their practice in one of two ways:
- Technical practice
- Creative practice
There’s the time devoted to developing technique: Memorizing scales, running arpeggios with a metronome, working on articulation, and conquering the physical demands of playing an instrument.
And then there’s the creative approach to music. Thinking about chord progressions, improvising with play-a-longs, applying language and struggling playing what you hear…
The only problem is that most musicians rarely apply both of these approaches to the language of jazz. Technical practice goes in one box and being creative goes in another. And this is where the trouble begins.
I’m sure you know the feeling. Just jamming with play-a-longs lacks direction while hours of scale practice can leave you feeling uncreative and unmusical.
The truth is you need to find a way to apply both practice approaches to the language of jazz. And today we’ll show you how to reconcile the two in a way that will take your playing to new levels.
Let me explain…
Start by finding a line
To illustrate this concept in action, let’s find a piece of jazz language.
You can choose any line that you like from one of your favorite players, the process will be exactly the same.
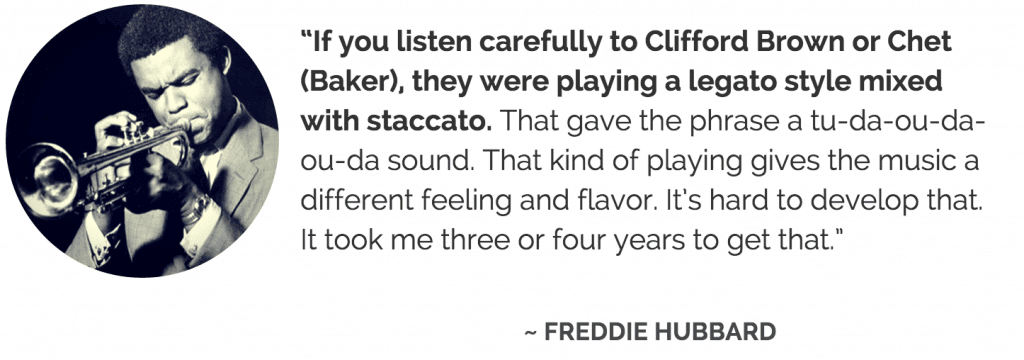
Check out Freddie Hubbard’s solo on One Finger Snap:
One line from a great improviser can contain a wealth of information, and as you can hear Freddie’s solo has a lifetime’s worth of musical information!
Near the beginning of his solo he plays the following line:
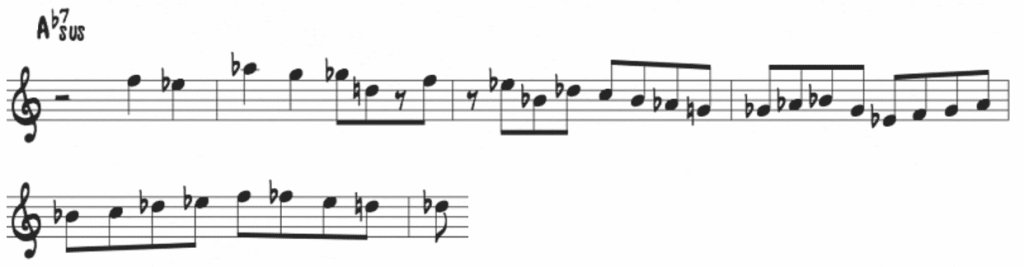
A long melodic line played over an extended Ab7Sus sound…
Now most players would stop here after they’ve figured out the notes. Memorizing the fingerings and trying to squeeze this lick into their solos.
But this method will still leave you feeling musically frustrated. You haven’t improved your technique or learned to apply this information in a creative way.
To achieve this, you need to take two more steps…
#1) Time to Get Technical
The first step is isolating the technical elements of this musical line.
As you look at this Freddie Hubbard line, ask yourself: What is physically required to produce this line on my instrument with ease?
Remember Transcribing isn’t just about getting the notes or stealing licks. To improve as a player you need to take his approach to sound, time and technique and absorb it into your own playing.
When you attempt to play the line what is tripping you up – the speed, the range, the key, or something else entirely?
Extract the concepts at work behind the line and then isolate them in the practice room, mastering each one at a time.
Put a magnifying glass to those five measures and isolate each harmonic, melodic, and instrumental technique that he is using. It’s a good idea to create your own personal exercise with each technique.
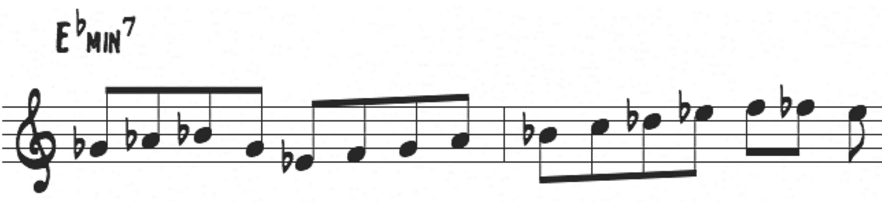
As an example, let’s focus on one particular section of this line:
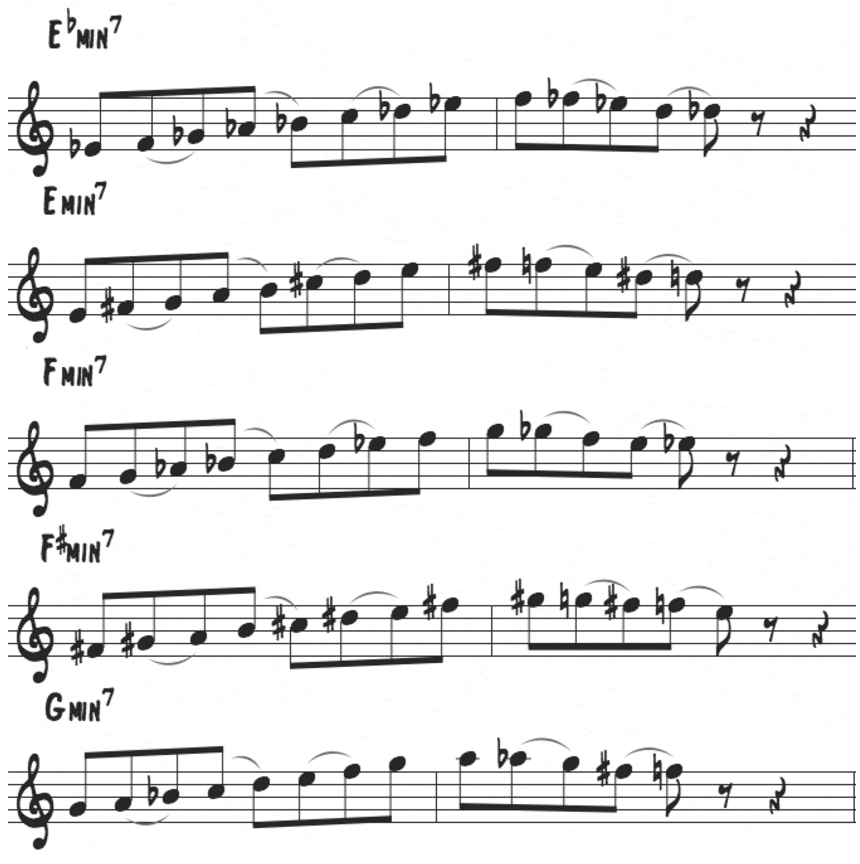
Over the static Ab7Sus chord he uses an Eb minor (dorian) scale up to the 9th and descends chromatically to the b7th.
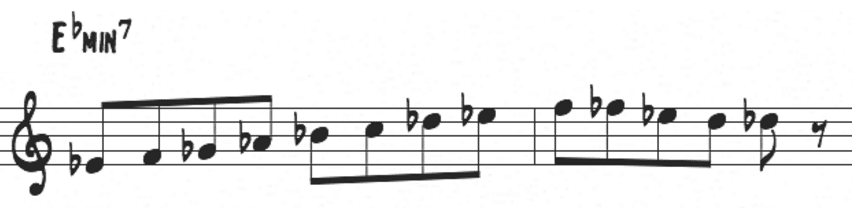
Now focus on how he articulates the line to create a swinging feel connected to the time. Slow down the line in a program like Transcribe! to really dig into the subtleties of the way he plays the line:
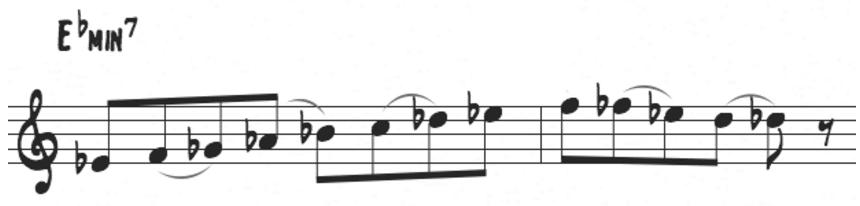
Practice this dorian scale pattern in all 12 keys, focusing specifically on the articulation. Repeat it in each key with a metronome until you can play it at the tempo of the recording:
Now you have a technique in all keys that you can apply to the minor and V7 chords in your solos.
Keep in mind that this dorian lick is just one technical aspect of this one Freddie Hubbard line. Follow the same process for mastering the other techniques in the line. For example, practice the:
- Enclosures in the 2nd and 3rd bar
- The Bebop scale fragment in the 3rd to 4th bar
- The shape of the first 5 notes, starting on the 13th of V7
- What other devices can you find??
And if you want more techniques like this at your fingertips and a ton of explanations on our personal process, make sure to check out our Jazz Language Course – Melodic Power.

#2) Now Get Creative
So you’ve transcribed a line. You’ve memorized a lick. And you’ve spent hours ingraining the various techniques in all 12 keys. Now what?
The second part to learning this piece of jazz language is learning to apply it in a creative way to your solos – to improvise with it.
Start by studying how Freddie uses the language over the harmonic backdrop of the chord progression. Over the extended Ab7sus chord he is using his language in 3 ways:
![]()

![]()
![]()

Let’s start with the dominant language and apply it to a chord or a tune. For instance, after you’ve memorized and mastered this dominant line in all 12 keys, try applying it to the bridge of Rhythm Changes:
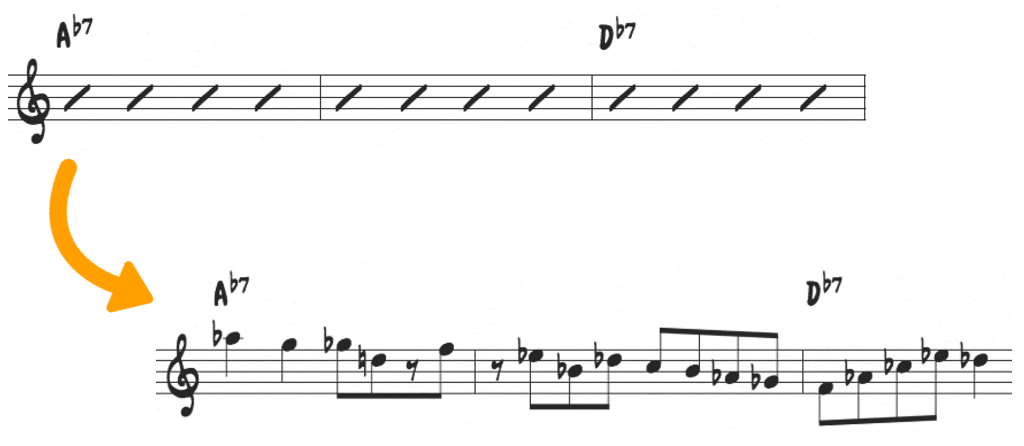
Now do the same with the other two pieces of language (minor and ii-V7). Apply the minor language to minor or V7 chords and the ii-V7 lines to the chord progressions of the tunes you’re playing.
The next step is variation – how can you alter or improvise with this line to make it your own?
Use your creativity to make music with this line that you’ve transcribed. Experiment and improvise with different ways to make the line your own:
- Rhythmic variation
- Harmonic alteration or substitution
- And combining it with other language
Turn on a play-a-long or backing track and use this language and technique as the starting point for your solos.
The truth is…
You have to have both sides to be a complete musician.
A technical player solely focused on scales and theory will lack creativity and musicality. And the musician that just “jams” in the practice room will encounter barriers to improvement because there’s a lack of structure and defined goals.
Look at your own practice routine. Are you just playing along with background tracks without incorporating focused technical practice? Or are you endlessly running exercises without creatively applying them to your solos?
If you’re serious about taking your playing from good to great, give this two-step approach a shot the next time you’re in the practice room!